Nowadays, people usually use their mobile phones to take the photos. Those photos carry the memories, and it will be terrible to lose them. As a user of Android device, I always store many photos on the SD card of my mobile phone. And once, I deleted some important photos by accident, when I was giving my phone a spring clean. Instead of be upset, I used a professional SD Card Photo Recovery tool to help me retrieve the photos from SD card with ease. If you want to know the way I use, please read the following passages and I will make it easy for you.
The tool I used and am using is called the Fonelab for Android, which is a professional tool for recovering the photos and pictures from the SD cards. Besides, you can also recover the lost contacts and messages with it. It is for the Android devices only, but it supports many models of Android devices, including the mobile phones and the tablets. And it can also help you back up your data on your Android device.
In fact, the photos you delete from your SD card are not actually removed right away. Instead, you can still get access to them if you use the right way. But if you keep on using your Android device, those deleted photos may be overwritten by the new data. So if you have some important photos lost or deleted, it is advisable to use the FoneLab for Android as soon as possible.
Here is the detailed tutorial for your reference.
Step 1. Download and install the SD Card Photo Recovery – FoneLab for Android
Download the correct version of the FoneLab for Android on your computer. It is noticeable that there are two versions of this tool, both for the Windows computer and the Mac computer. After downloading, perform the installation.


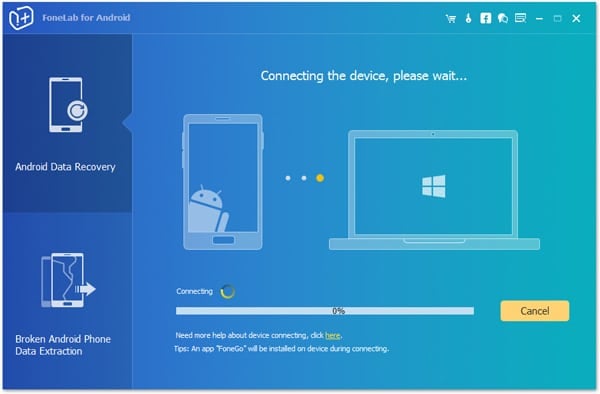
Step 2. Connect your Android device
With a USB cable, connect your Android device to your computer. And the FoneLab for Android will detect your device, and show you the information of your device on the interface of the FoneLab for Android.
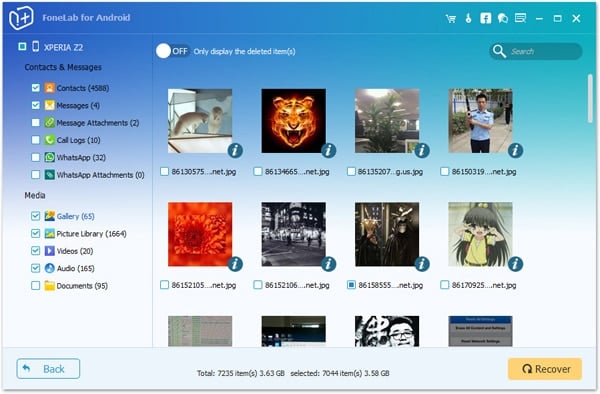
Step 3. Scan the deleted photos
Then on the interface, you can choose the “Media” option, and then tap on the “Gallery” option and then the “Picture Library” option. Of course, if you want to recover the contacts or the messages on your device, you can also choose them instead. And then tap on the “Next” button to start the scanning process.

Step 4. Preview the photos available
After the scanning process, you can preview the photos found before you decide which one to recover. When you preview the photos, you can check the one that you want to recover.
Step 5. Recover the selected photos from SD card
When you finish previewing the photos, you must have a list of photos for recover. Simply click on the “Recover” button to start the recovering process on the Fonelab for Android.

Step 6. Finish the whole process
After a few minutes, the SD card photos recovering process will be finished, and you will get all the photos you chose. Remember, all the recovered photos will be stored on your computer. And you can also transfer them to your Android device afterwards.